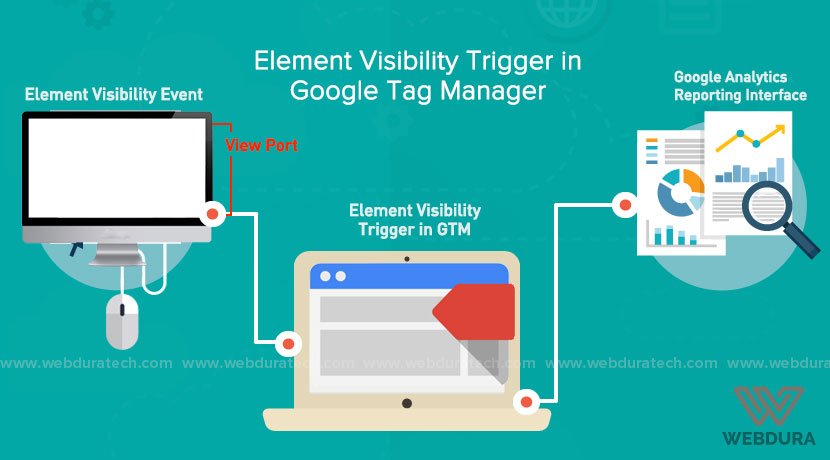
More often than not, we would like to track the number of views by a user on a certain web page element or browser area. Usually, for tracking such web page elements we were dependent on paid UX tools such as Hotjar, Usability tools or Woopra. But with the newly introduced trigger called ‘Element Visibility Trigger,’ we can now track visible area of a browser’s viewport easily through Google Tag Manager. In short, the element visibility trigger will fire whenever a specific element or group of elements appear in the visible area of the user’s screen area.
How to track element visibility events using element visibility trigger in Google Tag Manager
Below steps will guide you to track element visibility on your website using Element Visibility Trigger in GTM :
Step 1 – Creating and Configuring Element Visibility Trigger in Google Tag Manager
Go to your Google tag manager account and select the trigger section.
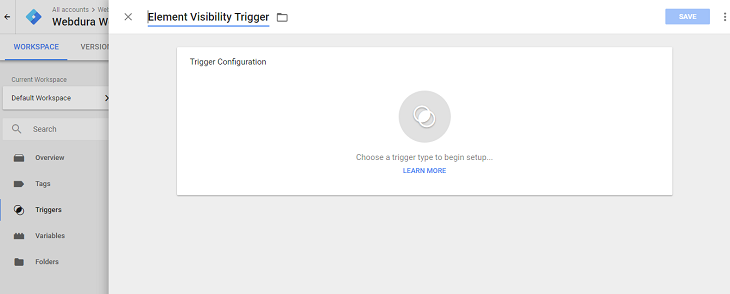
Configure Element Visibility Trigger by clicking ‘New Trigger’ and name this trigger as ‘Element Visibility Trigger’ or any other name you find suitable.
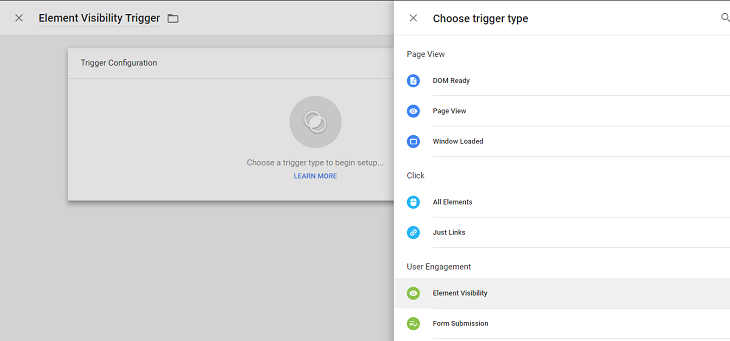
Now configure the trigger by selecting ‘Element Visibility’ as the trigger type.
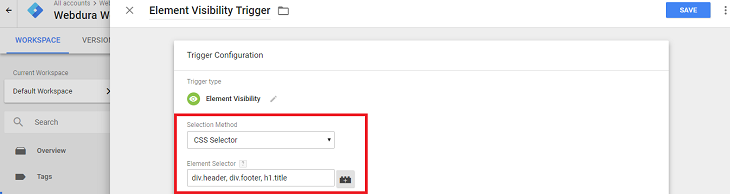
Element Visibility Trigger provides two methods of selection:
- ID – Using this method, you can select a specific element to appear in the user’s viewport. E.g. header element, footer element or content element
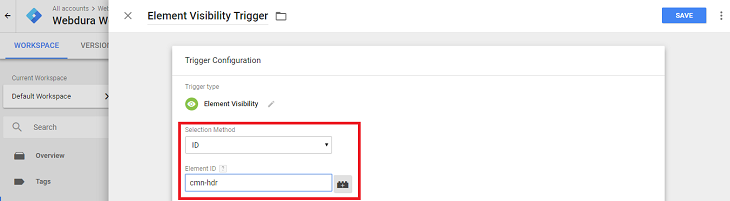
- CSS Selector – Here you can select an element or group of elements to appear in the visible area of user’s browser. E.g. .div.header, div.footer, h1.title
Let’s select Element ID as the selection method and let’s assume we need to track the header element of the browser’s viewport. Below screenshot shows header id on the website to be tracked.Below screenshot shows header id on the website to be tracked 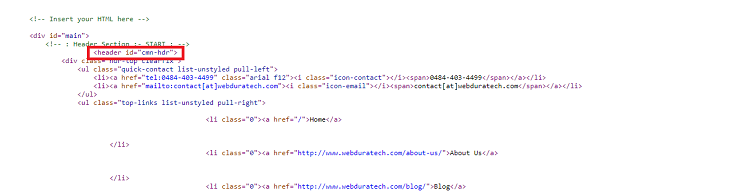
The header ID, in this case, is ‘cmn-hdr.’ Now provide this Id in the element id column
In the next step, you can select when to fire this trigger and the ideal options associated with it are:
- Once per Page – the trigger fires once per page load.
- Once per Element – the trigger will fire once the specific element (cmn-hdr) appears in the visible area of the users’ viewport
- Every Time an element appears on the screen – the trigger fires whenever the element appears on the screen.
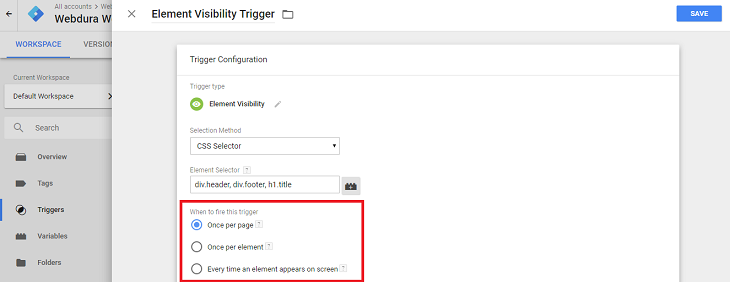
In an ideal scenario, we would select ‘Once per element’ or ‘Once Per Page’ options to avoid data manipulation. Let’s select ‘Once Per Page’ for the purpose of this tutorial
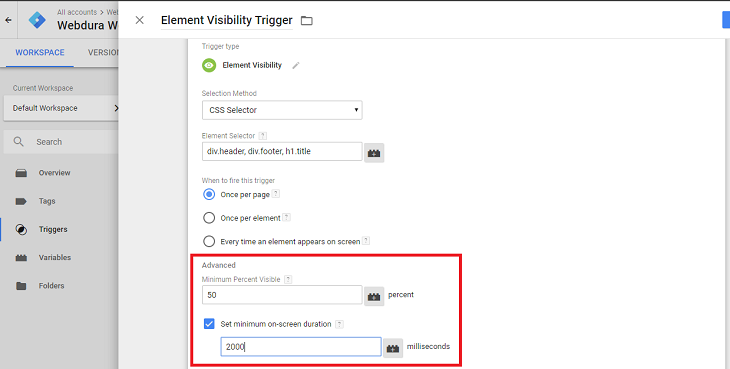
Element Visibility Trigger also provides advanced options like :
- Minimum Percent Visible – The percentage of the provided element visible to the user before the trigger fires. E.g. 50 Percent, 70 Percent or 100 Percent.
- Set Minimum On Screen Duration – The minimum amount of time the element should be visible on the screen before the trigger fires. E.g. 2000 Milliseconds (2 seconds), 5000 Milliseconds (5 seconds)
However, you need to be careful while setting a minimum on screen duration for matching multiple web elements as it can seriously affect your webpage load time. So be careful to match a few web elements while selecting CSS Selector as your element selection method or use Element ID as the selection method instead.
In the next configuration step, you will be asked when to fire the trigger.You can either opt for the trigger to fire on all visible events or you can specifically select an event such as ‘click classes matches ‘xyz’ or the page URL contains /landing, etc. 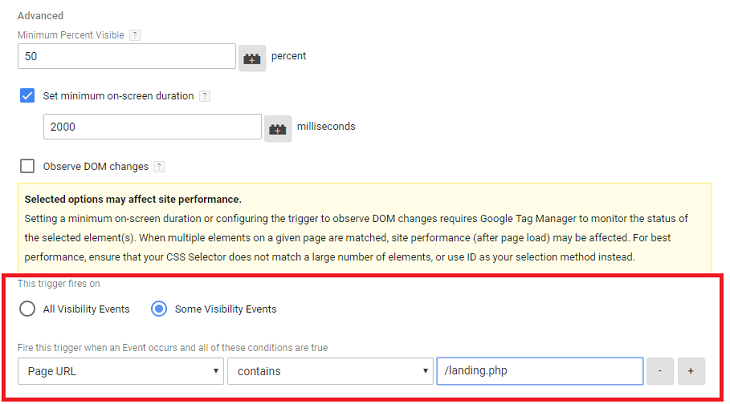
After Configuring the Trigger, save the trigger. 
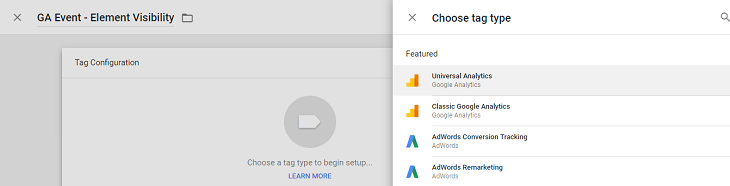
Step 2 – Creating and Configuring Google Analytics Element Visibility Event Tag
For creating this tag, go to tag section in Google Tag Manager and click ‘New’ Tag
Now name the tag as ‘GA Event – Element Visibility’ or any name you find suitable.
After naming the tag, start configuring it by selecting Universal Analytics as the tag type.
Select ‘Event’ as the Track Type. 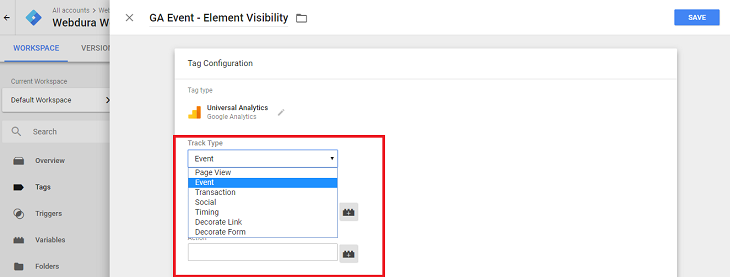
Now provide the Event Tracking Parameters for this tag to be seen in Google Analytics Reporting Interface.
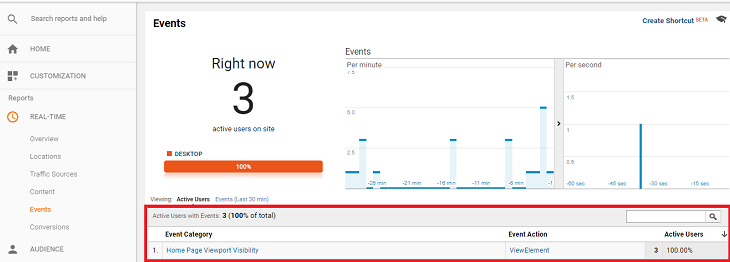
It would be best to use a custom name for the Event category as it would be easier to find the same while generating a report. Eg: ’Home Page Viewport Visibility’ or something similar.
The Event Action can be named as ‘View Element’ The event label can be selected as Page Path Variable ({{Page Path}}). Event value can be left blank or you can provide a suitable value.
Non Interaction Hit can be provided as ‘False’ if you want to record non-interaction hits.
![]()
Now select ‘enable overriding settings in this tag’ option and provide your Google Analytics Property Tracking Id (UA- X*******-X)
Now select the firing trigger by enabling the configured Element Visibility Trigger and save the tag. 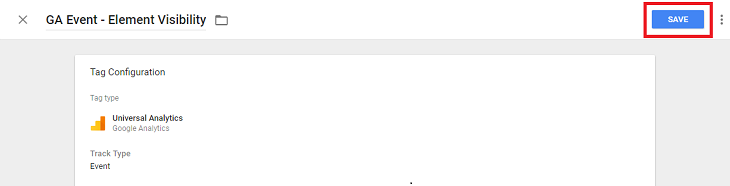
Step 3 – Preview and Debug the Created Google Analytics Tag
Preview the created Google Analytics Event Tag by going into preview and debug mode. This can be done by clicking the Preview button on the top right corner of your GTM interface next to submit button. 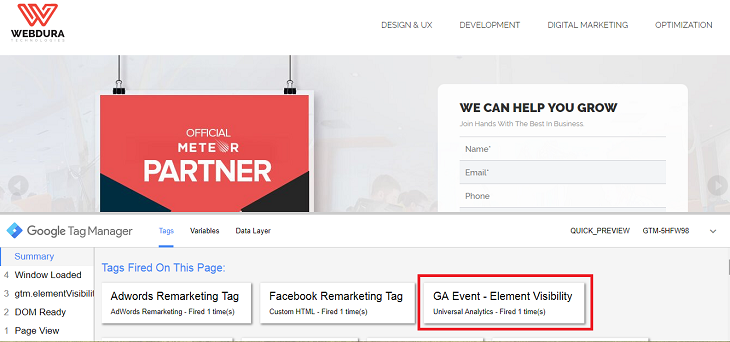
Now check whether the tag fires when the specific element appears in front of the screen.
If the tag fires then your tag and trigger configurations are working fine if it doesn’t then you need to check for errors in the tag and trigger configuration.
Step 4 – Create Version and Publish Changes
If the tag fires successfully then create a new version of Google Tag Manager. 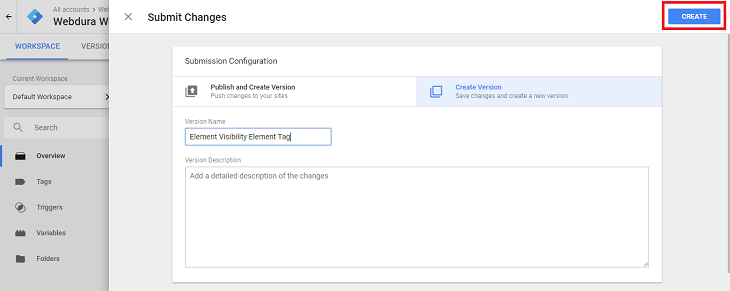
After creating a new version, publish the Visibility Event Tag to make the changes live. 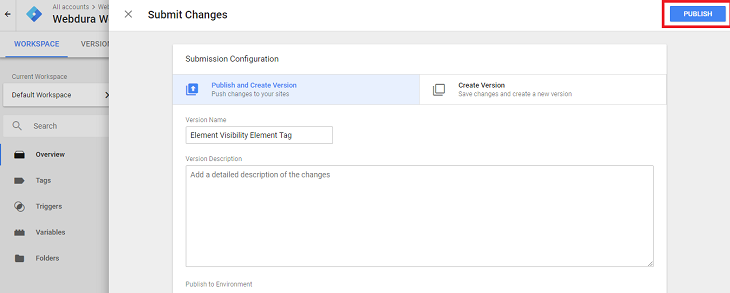
Now you can view the triggered events in Google Analytics Reporting Interface.
Step 5 – View Element Visibility Event Report in Google Analytics
Go to Behaviour Section and select Events Overview, you can view events by category name, Action or Label. 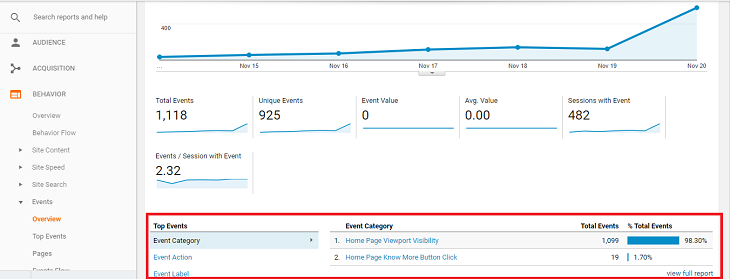
If you want to see real-time events, you can view it through Real-Time Reporting Section of the Google Analytics Interface.
Conclusion
Tracking user engagement is an important aspect of website conversion rate optimization. Tracking Views or interaction of a specific web element can provide useful web page insights. With this user engagement data, you can optimize your website to achieve more conversions. So Element Visibility trigger in Google Tag Manager can be considered as the new revolution in user experience tracking of websites.


Comments